
Alcohol ink isn’t the cheapest process art material but it has come down in price a lot recently and you can create some stunning results with it. As well as these beautiful alcohol ink coasters, you can also create these Christmas tree baubles or these bookmarks, both of which make great gifts for teachers. The process of putting alcohol ink on tiles is quite simple so it can be done by quite young children but you might be unwilling to risk them spilling it, or indeed drinking it if they are very young.
This post contains affiliate links (identified with a *) I earn a commisson from qualifying purchases
What you Need to Make Alcohol Ink Coasters
- Alcohol Inks – 3 or 4 colours is enough to create good results, we’ve now bought a a set which is better value*
- White Tiles – If you want them to be coasters you’ll need to get small tiles, we bought ours in B&Q
Optional
- Cork Backing* – These make the tiles more like real coasters
- Compressed air – compressed air* can be used to spread the alcohol ink creating interesting patterns on the tiles, it’s also handy for cleaning keyboards!
- An Alcohol ink applicator – You can create a different effect with these (find out how to make your own)
- Varnish – If you leave them unvarnished the colours will eventually wear away, we used polyurethane top coat spray*
- Rubbing Alcohol*– You can use this to clean the alcohol ink if you don’t like the results.

Creating your Alcohol Ink Tile Coasters
Alcohol inks dry very quickly so speed is important. Choose your colours (two or three combined creates a good result) and put a few drops of each colour onto your coaster. Then you can either spread the ink by spraying it with the compressed air or just tilting the tile to spread it. Even if you just leave the drops to sit they will spread.
Alternatively, you can use an alcohol ink applicator to apply the ink to the tile coaster. You can then add more drops where you need them to cover the white areas.

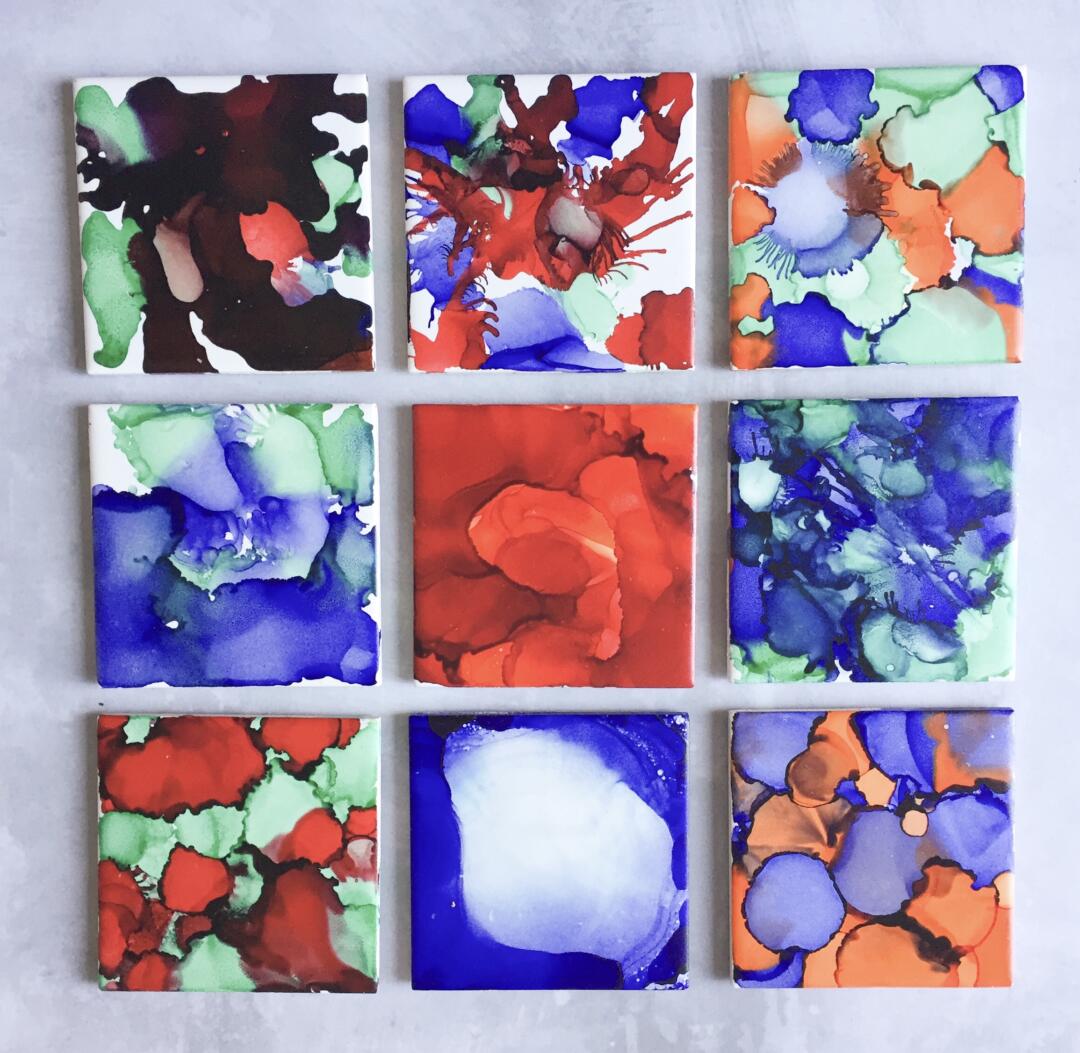
Boy Child created my favourite results with this project. He added lots of the same colour ink to a tile and then used the compressed air to spread it around so he ended up with areas where the colour was dark and areas where it was light. Girl child left some white space on hers which also worked well. I love bold colour combinations and covered my tiles completely in two colours, the red and green combination is my favourite.

The great thing about using alcohol ink on tiles is that if you don’t like the results, you can just wash it off and start again. It comes off really easy with the alcohol spray.
You can also use the alcohol spray to create a different effect by using a dropper to drip some onto the tile once the alcohol ink has been applied. The alcohol will dissolve the ink creating a pattern.
Turning the Tiles into Coasters
Right now you must have tiles painted with alcohol ink so now we need to turn them into coasters. We do that by adding a backing and sealing the alcohol ink. You may need to trim your cork backings before you put them on, which you can do with regular scissors as long as they are sharp. Once they are the right size, just peel off the backing and stick them on. You do need to get it right first time as the cork is very sticky and can be repositioned.

Sealing the Alcohol Coasters
A spray varnish is best for these alcohol coasters because if you brush something on you risk ruining the pattern you’ve created. Make sure you spray them outside, away from children because of the fumes and follow the instructions on the tin. Most polyurethane sprays require several layers with drying time between each layer.

I absolutely love how vibrant the colours look on our completed alcohol ink tile coasters, we plan to keep some and give some away as gifts. If you don’t want to make coasters you could use larger white tiles and just create art work for display. If you don’t want to spend out on alcohol inks you could have a go at our sharpie coasters which is similar result but using cheaper materials.
Enjoyed this Post? Why not pin it for later!

Leave a Reply