Since we bought a bumper pack of food colouring from Amazon, I’ve been surprised how many things we’ve used it for that are totally unrelated to baking! These sun catchers are made by painting on wet glue with food colouring. You could make these pretty marbled sun catchers with liquid water colours too however food colouring is much cheaper. This is a process art activity where less is more which can sometimes be hard for younger children to appreciate. It would work well with kids from about 4, with a bit of guidance.
This post contains affiliate links (identified with a *) I earn a commisson from qualifying purchases
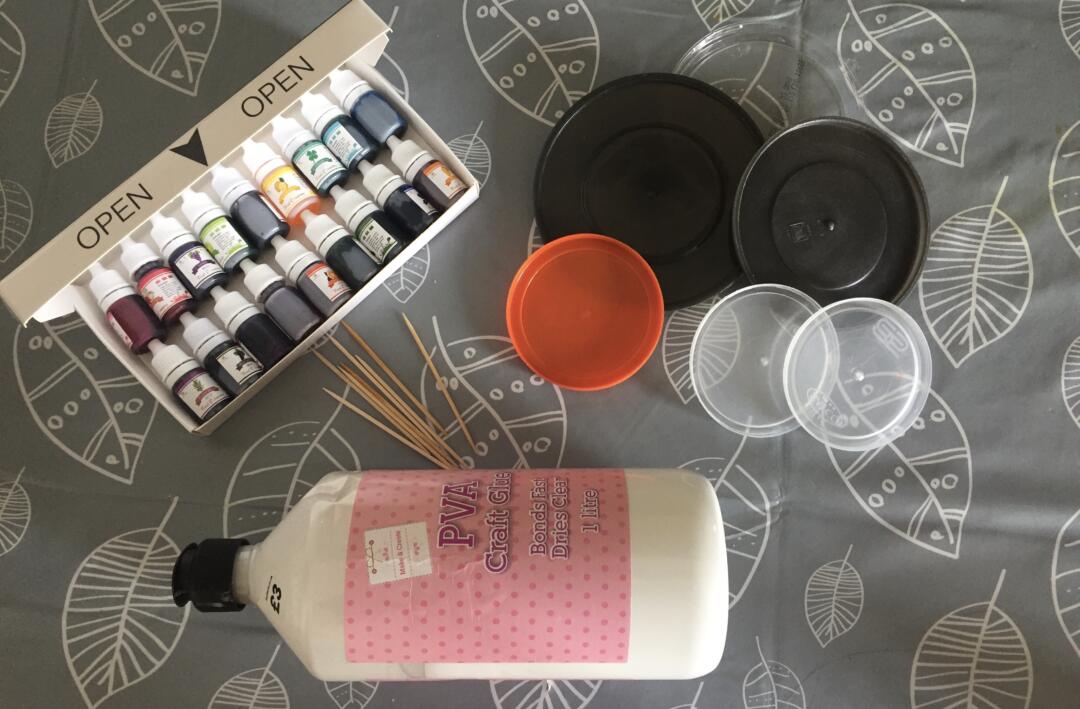
Equipment to Make Sun Catchers
- PVA Glue – You need quite a lot for this so you might want to top up your supply*
- Food Colouring – We use this great set*, you could also use liquid water colours
- Cocktail Sticks – These are used to marble the paint, skewers or any other pointy stick could work in their place
- Lids – I was planning this activity for a while so saved some lids from things like humus and yoghurt pots but also used some lids for round Tupperware type containers which survived the process fine
Preparing to Create your Sun Catchers
You’ll need to squeeze a good amount of glue into each of the lids. You need enough to generously cover the bottom. If they are too thin you wont be able to get them out of the lids. If they are too think they’ll take a ages to dry and waste your glue. If in doubt, add a bit more. Remember to to let it spread into any lips on the lids before deciding if you have enough.

Adding the Food Colouring and Marbling
We found lighter, brighter colours worked best for this. If you want to use darker ones, use them sparingly. You just need a few drops of each colour, otherwise they all blend together too much.

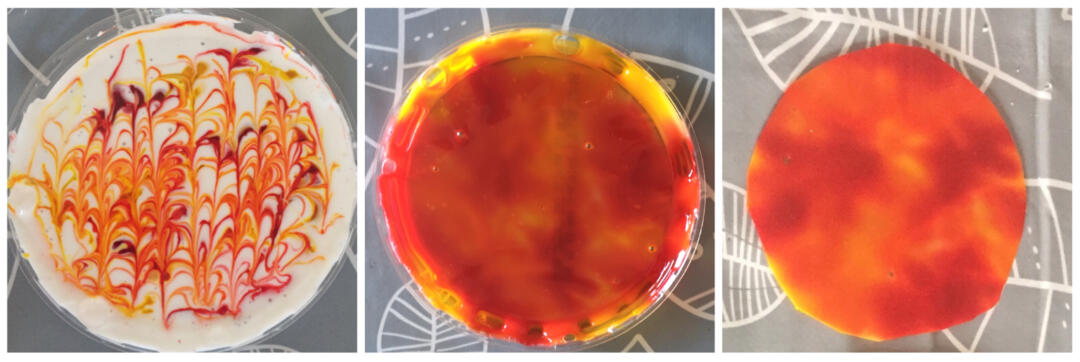
Once you’ve added your colour drops, use the cocktail sticks to swirl the colours around the glue. This will leave you with a marbled effect shown in the 1st and 3rd picture below.

As the glue dries, the food colouring will bleed and sort of melt in to the glue so the finished effect will be quite different (seen in the 2nd and 4th photos above). If you have added too much colour, or too many dark colours, your colours won’t have any definition.
Finishing and displaying the Sun Catchers
It will take quite a while for the glue to dry, ours took between 36 and 72 hours to be completely dry. It will depend how thick they are and what the weather is like. Once they are dry, you can use a small knife to lift one edge and then peel the sun catcher out of the lid.
We decided to trim ours to remove the ridge around the edge created by the lip of the lids. You could also cut them in to shapes, like hearts or stars.
For display, we simply used a little more PVA glue to stick them to our windows. It dries clear and peels off easily when you want to take them down. If you don’t want to do that you just pop a small hole in each one and add string to hang them from.

Overall, we had mixed results with this because some of the sun catchers had a bit too much food colouring but with the benefit of hindsight we’d be able to create even better ones next time. If you’re looking for some other uses for food colouring, check out how we got on with shaving foam marbling and bubble painting.
Enjoyed this Post? Why not pin it for later!
Leave a Reply