
Paint pouring is something I’ve always wanted to try, it’s the ultimate process art. I’m addicted to watching videos of it on Pinterest and Facebook (who have noticed my addiction and keep feeding it). I was put off because I thought it would be expensive. It also seemed really complicated. I did a bit of research and realised that, if you’re just doing it for fun, it really doesn’t need to be complicated or expensive. Here’s a simplified method of paint pouring with children, you can try on a budget.
This post contains affiliate links (identified with a *) I earn a commisson from qualifying purchases
Equipment you’ll need for Paint Pouring
- Paint – Honestly you can have a go with what ever you’ve got. I had some old acrylics in tubes from my teenage years but cheap acrylics* will do fine too
- PVA Glue* – This is to use as a pouting medium, how much you need will depend on the paints you use.
- Pots to mix in – We used a set of plastic bowls the first time and then I invested in these plastic bottles* so that I could store my pouring paint for a few weeks
- Something to mix with – lolly sticks* are great but you can just use spoons
- Something to pour from – I used paper cups* as I had some but plastic cups that you don’t drink out of anymore would work too.
- Something to pour on to – Paint pours are very wet so you can’t just use paper. Plain white tiles work well and are easy to wash off if you don’t like the results. We used these canvasses*. You can use canvas boards*, although they can warp, but it’s not a huge problem if you’re just doing it for fun.

Preparing for your Paint Pouring
The first job is to turn your PVA glue into pouring medium. You do this by mixing 2 parts PVA glue to 1 part water. Mix them well and set aside.
If you are using craft type paint or cheap liquid acrylics, you need to mix the paint and the pouring medium in a ratio of 1 part paint to 1 part pouting medium. If you are using thicker acrylic paints that come in a tube, you want a ration of 1 part paint to 2 parts pouring medium. Mix the paint and pouring medium together well, you should end up with a consistency like pouring cream.
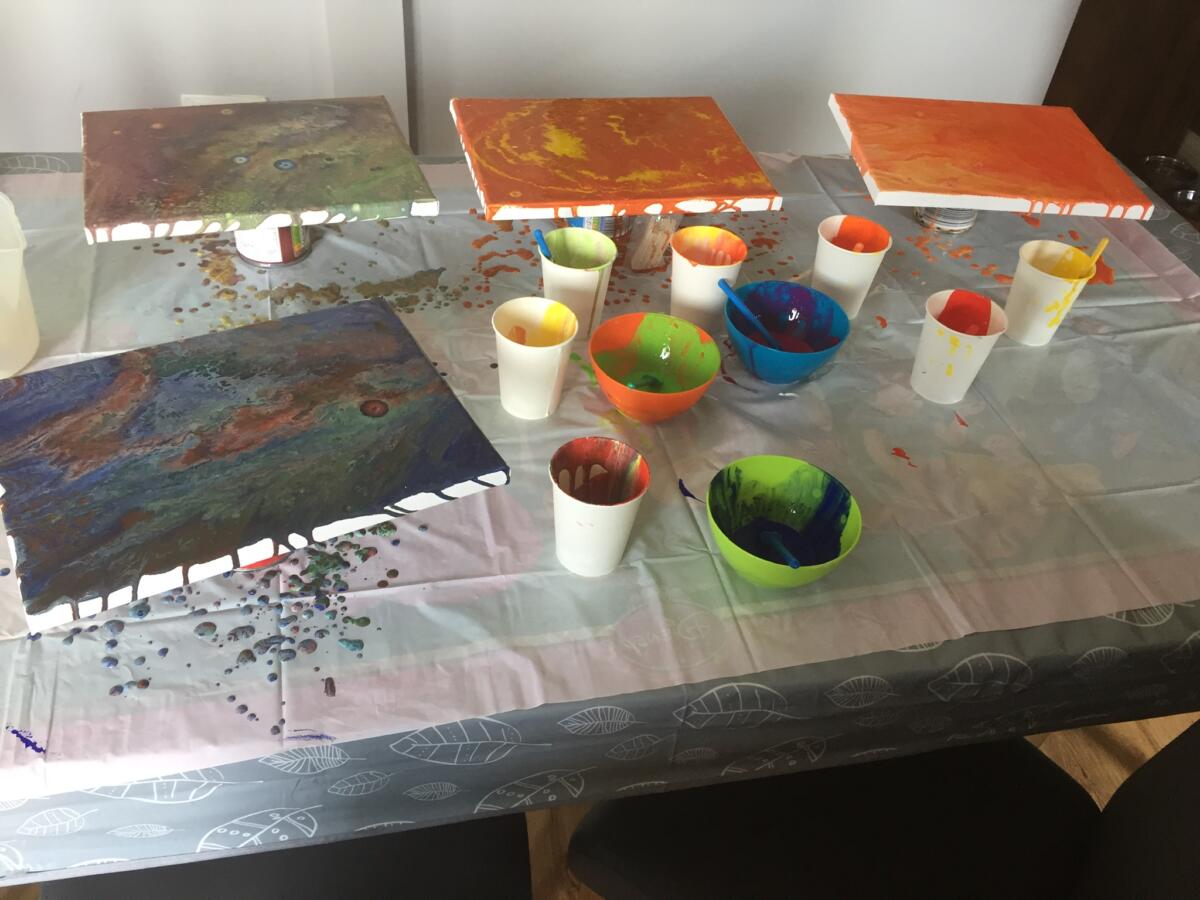
The choice of colours is up to you but you seem to get the best results of you include white and 3 or 4 other colours. Paint pouring is very messy so I suggest you protect whatever surface you’re working on, we has kept hold of old plastic party table clothes and put one of those down so that we could just throw the whole thing away afterwards.

Pouring your Paint
Once all of your paint is prepared, you need to put it into your pouring container. You do this by adding the paints in layers one at a time. It’s easy to underestimate how much paint you need, aim to get your cup at least two thirds full for canvasses around A4 size.
When you are ready to pour, place your canvas on top of your cup.
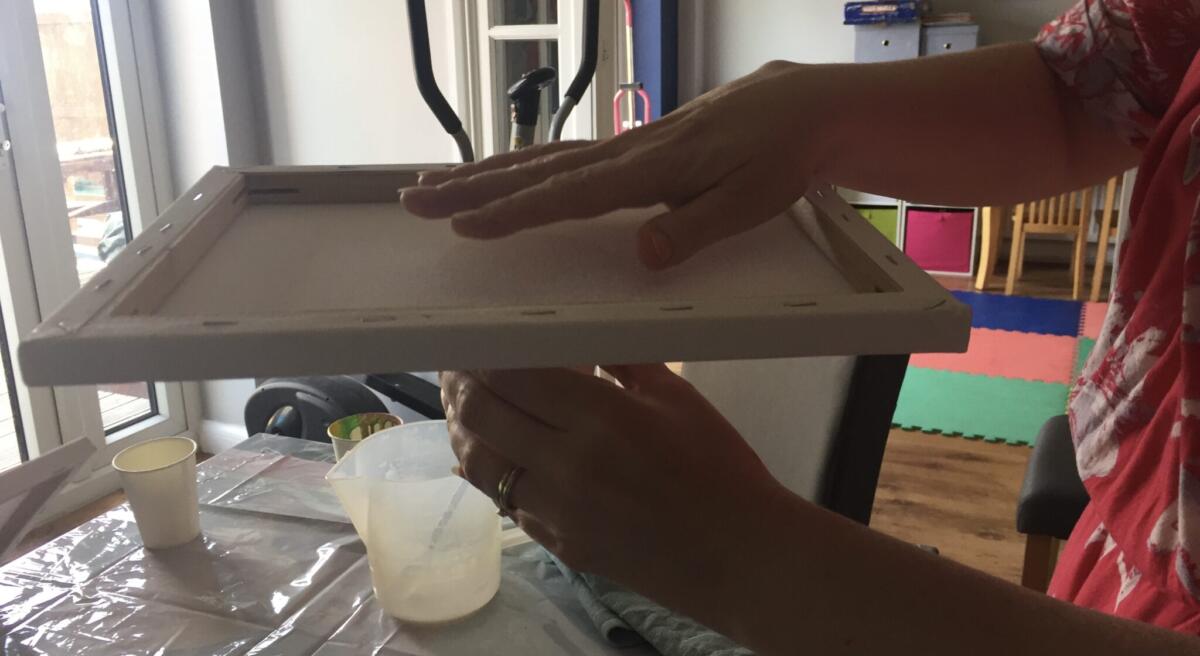
Turn the canvas and cup over

Lift the cup off the canvas so that the paint pours

Tilt your canvas around to get the paint to cover the whole canvas
Because there will be excess paint that needs to run off, it’s useful to have something you can sit your work on, we used cans of soups, the poured paint will take a long time to dry, mine were around 12 hours.
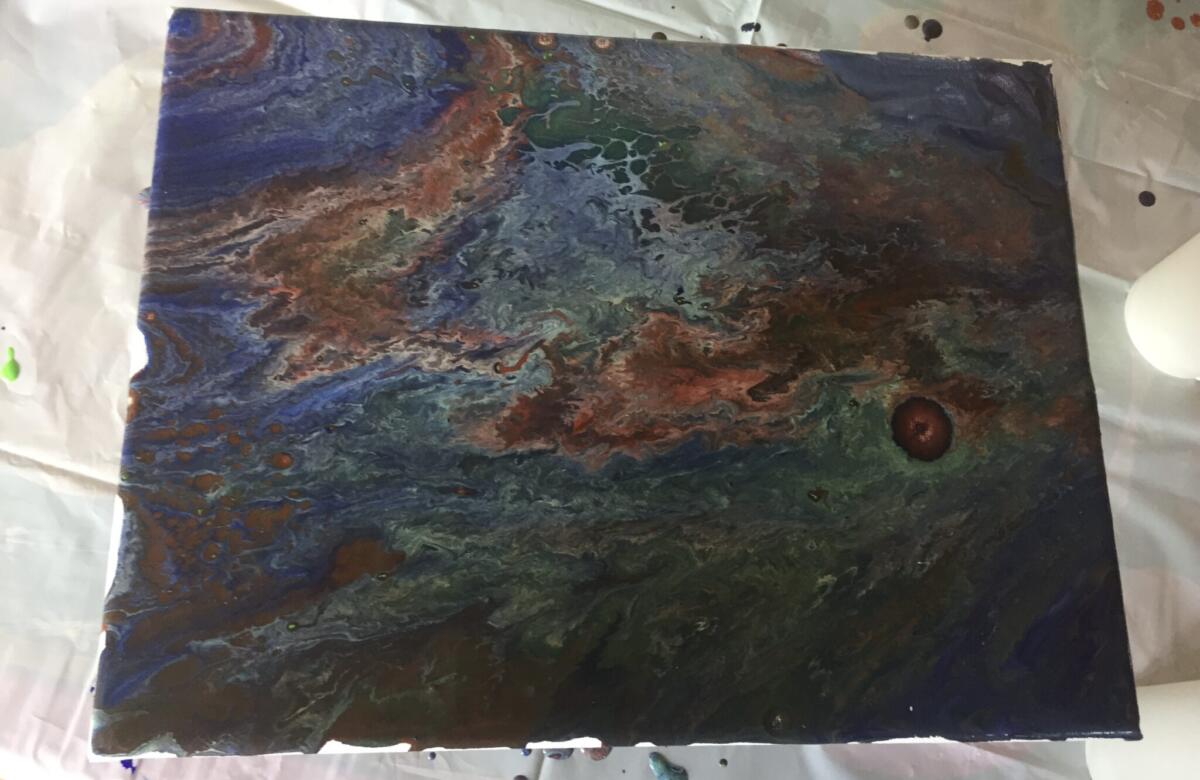
Whilst lots of the process art projects we do can be used in some practical way, these paint pours really are just decorative and the children and I each have one on the walls of our rooms.
If you enjoyed this you might also like squeegee painting or making art with bleeding tissue paper.

Leave a Reply