
I’ve always loved the marbled effect and we have had a go at marbling before using shaving foam and food colouring. Someone kindly gave me an Amazon voucher recently and I decided to use it to treat myself to some marbling ink. The kids and I had a go with them last week and I love the results. They weren’t excessively expensive and you don’t need a huge amount but be warned, it is a bit addictive, we could have carried on experimenting all day!
This post contains affiliate links (identified with a *) I earn a commisson from qualifying purchases
Equipment needed for Marbling Card
- Marbling Inks – There are a variety of reasonably priced marbling inks* you can choose from
- Card – We decided to marble on to card* rather than paper because it copes better with getting wet
- Containers – You need big enough containers for the size of card you want to marble, we cut our card down to A5 size so just used large mixing bowls
- Cocktail sticks/cotton buds or similar – Something pointy you can marble the ink with
- Kitchen towel – The card tends to drip when you take it off the water so you may need to wipe up

Getting Ready to Use the Marbling Ink
The marbling inks are oil based so will stain clothes, best to make sure you aren’t wearing you Sunday best before you start. You”ll need to fill the container with clean water and choose your colours. We experimented with different numbers of colours and found too many let to a muddy effect, 2 or 3 colours seemed to give the best results.
Marbling with Marbling Ink
Most marbling inks come in dropper bottles, you need to squeeze drops of each colour on to the surface of the water where they will float. You don’t need a huge amount, we got good results with the amount shown in the image below. If you use too much ink, you will end up with coloured oil sitting on surface of your card that won’t ever dry.
Once you’ve added the ink, you can start to marble it. Swirl your cocktail stick around the surface of the water, making the colours marble together. When you’re happy with the pattern, you need to gently put your card on to the surface of the water. You can achieve different effects by just placing it on the water and by pulling it across the surface.

We experimented with just putting half of the card in the water and leaving the other half white. They looked great initially however when they dried the oil from the inks leached onto the white side of the card which ruined the effect.
We also had a go at not marbling the ink and just creating a spotty pattern on the water, this created a nice effect too, different from our marbled creations.

The cards will need to be left to dry, the time it takes will depend how much water they absorbed. Once they were dry, we placed ours between a couple of sheets of kitchen roll with a heavy book on top to draw out the excess oil and flatten them out.

Uses for your Marbled Card
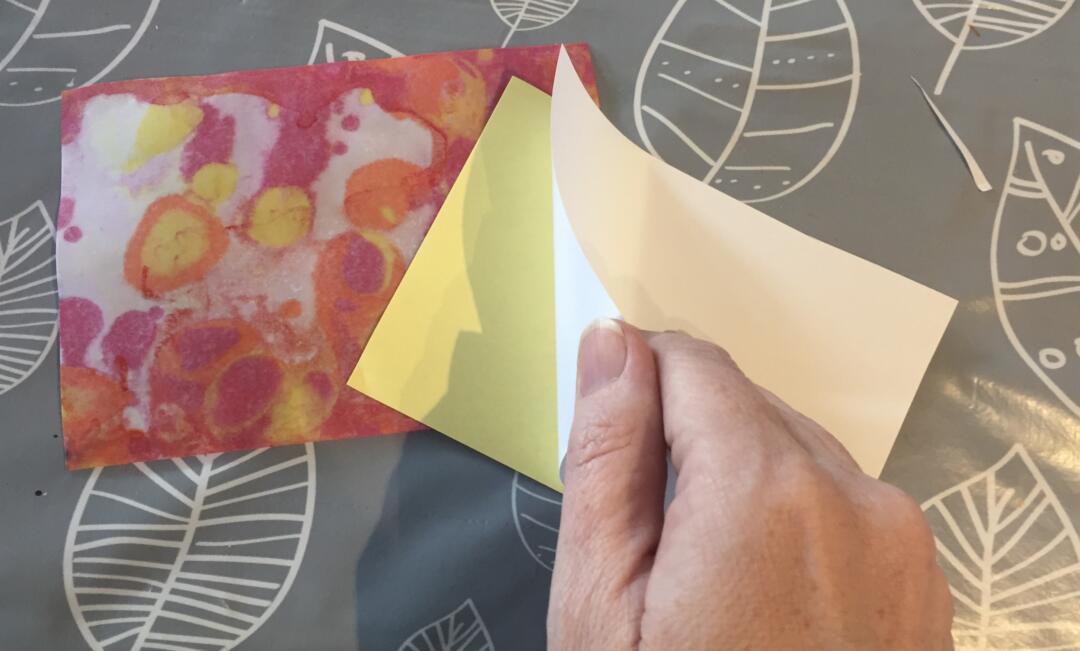
We chose to marble A5 size cards as we wanted to use them as post cards to send to friends and family. Once they were dry, we cut label paper to just smaller than A5 size and stuck it onto the backs of the marbled card. This strengthened them a bit and gave us somewhere to write our message and the address.
You could also use marbled card to create greetings cards but you would need to line it with something because the marbled effect comes through onto the reverse.
If you enjoyed this you might like to check out Marbling with Chalk and our other process art projects for kids.
Enjoyed this post? Why not pin it for later!

Leave a Reply